Recurring Donations
To get started with Recurring Donations, check out the steps below to learn how to do the following:
Enable Recurring Donations on a Fundraiser and set the default donation type
Edit Automated Email Templates connected to Recurring Donations
Access your Profile to edit your Recurring Donations
Admin users can set a minimum amount for Recurring Donations via Admin → General Settings.
They also have access to the Recurring Donations Report within Admin → Reports.
For more information, please see How to Access the Recurring Donations Report.
Note on Tax Receipts for Recurring Donations
Please note that Tax Receipts for recurring donations are generated at year-end (First week of January of the following year) and are populated in your Tax Receipts Report automatically. All recurring donations for the year are consolidated into one tax receipt. These will show as ‘Annual’.
Getting Started with Recurring Donations
Enable Recurring Donations on a Fundraiser and set the default donation type
From your fundraiser, click Manage Fundraiser, then Donation Settings.

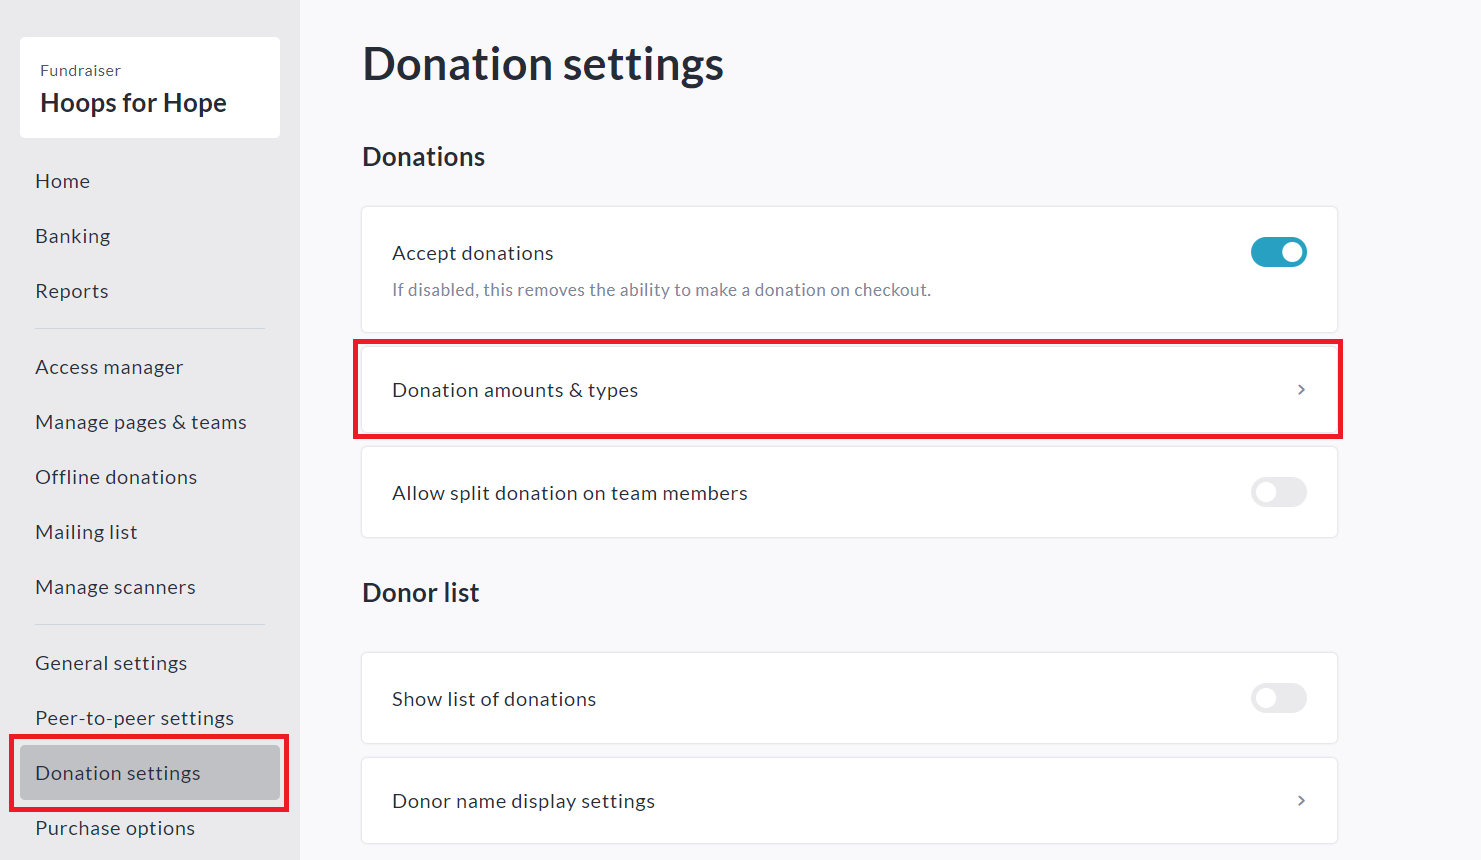
Click Donation amounts & types as shown above.
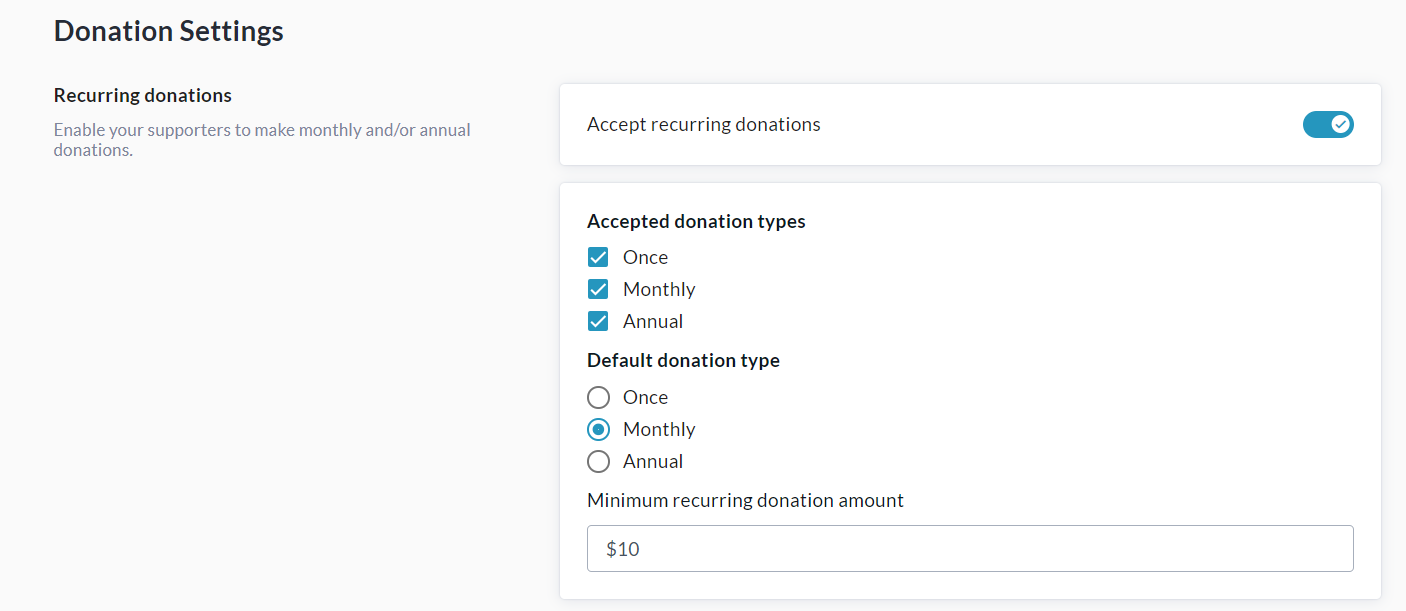
Enable Accept Recurring Donations, then specify your Accepted Donation Types, Default Donation Type, and Minimum Recurring Donation Amount. For example:
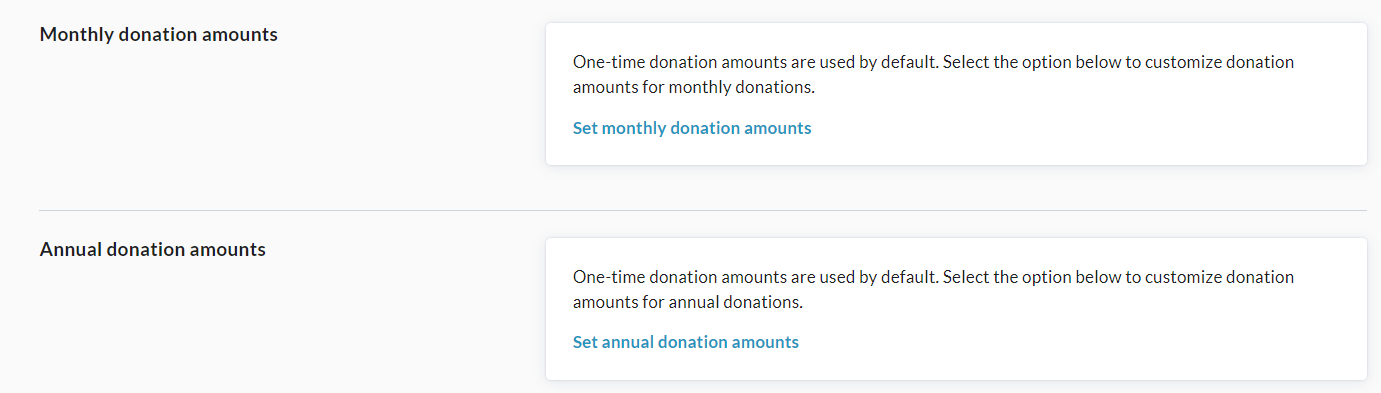
Optional - if desired, you can also set default donation amounts and impact statements for each type of donation you have enabled. To set monthly and annual donation amounts, scroll down to this section:
At the bottom of the page, click Save to confirm.
Edit Automated Email Templates connected to Recurring Donations
From your fundraiser, go to Manage Fundraiser → Automated Email Templates.
Click on any template you want to edit and toggle on I want to use my own text.

Edit the subject and message body as desired and click Save.
Optional: You can send yourself a Preview Email or Reset the message to default by clicking the respective buttons.
Access your Profile to update your Recurring Donations
From anywhere on your CrowdChange site, click Profile in in the top right, then My Profile
Select My Recurring Donations from the left sidebar.
For any recurring donation in the list, you can perform the following actions:
Change Amount - Note that if a minimum recurring donation amount is set at the Admin > General Settings level, you are not able to set the amount lower than this number.
Change Payment Day
Skip Next Payment
Pause & Resume Recurring Donation
Cancel Recurring Donation
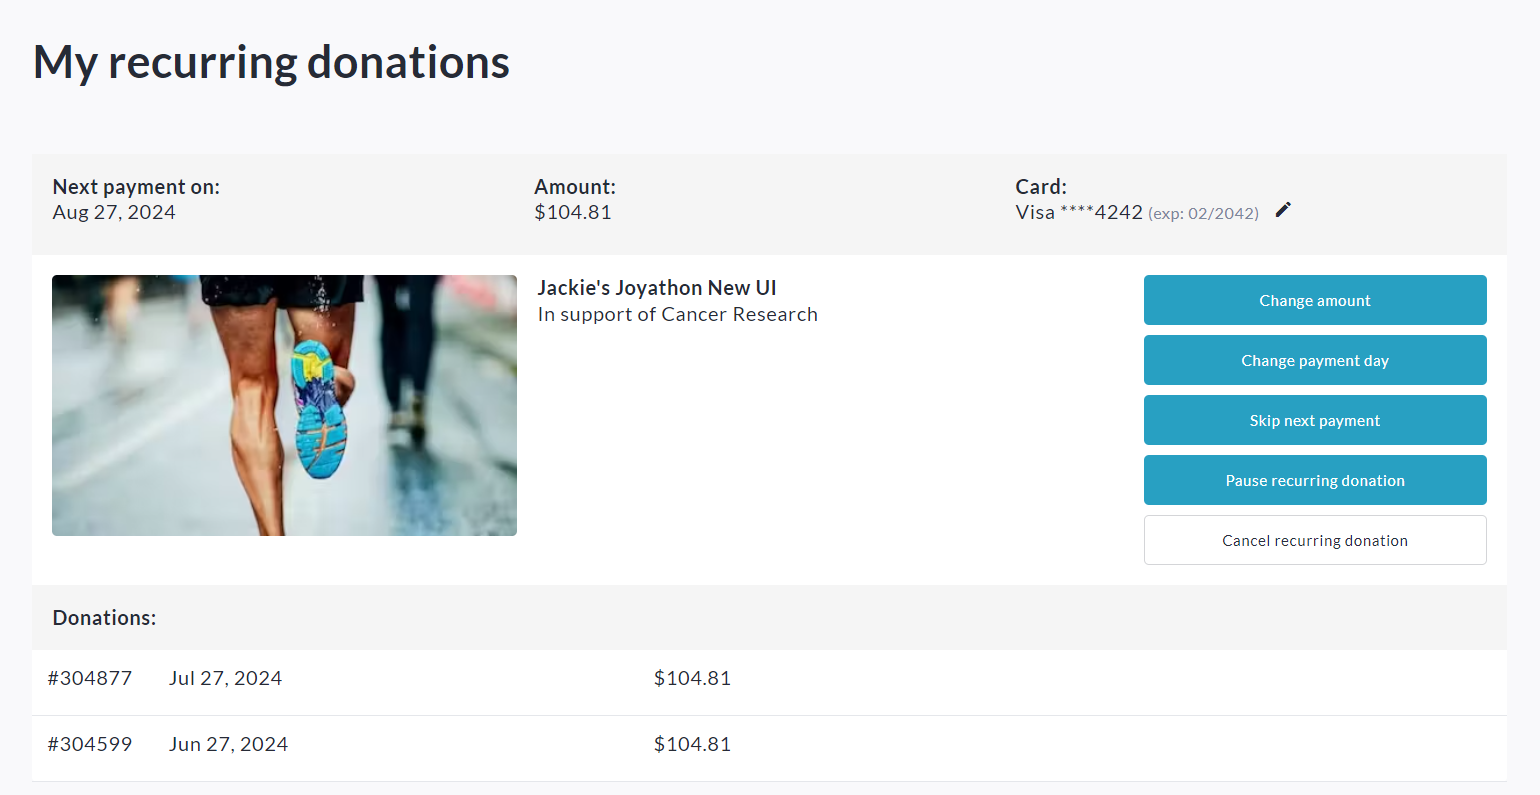
To update your payment method (credit / debit card), click the pencil icon next to the last 4 digits of your card number at the top of the recurring donation. Enter the new details and click Save to confirm.
If you would like to receive email notification for every recurring donation charge, you can enable this from Profile > Notifications > General Notifications
If a Recurring Donation Fails…
In cases where a Recurring Donation fails (for example: credit card has expired or amount exceeds limit), we will try to process the transaction again at a later date according to this timeline:
1st Failure → Notification email is sent to donor and Admin, advising that the charge failed and why. Retry in 3 days is scheduled.
2nd Failure → Retry in 7 days is scheduled.
3rd Failure → Retry in 7 days is scheduled.
4th Failure → Retry in 7 days is scheduled.
If Rety 4 fails, Recurring Donation is Paused - email notification will be sent to the donor stating that this donation has been paused, and that it can be resumed via the Profile section.